Preview
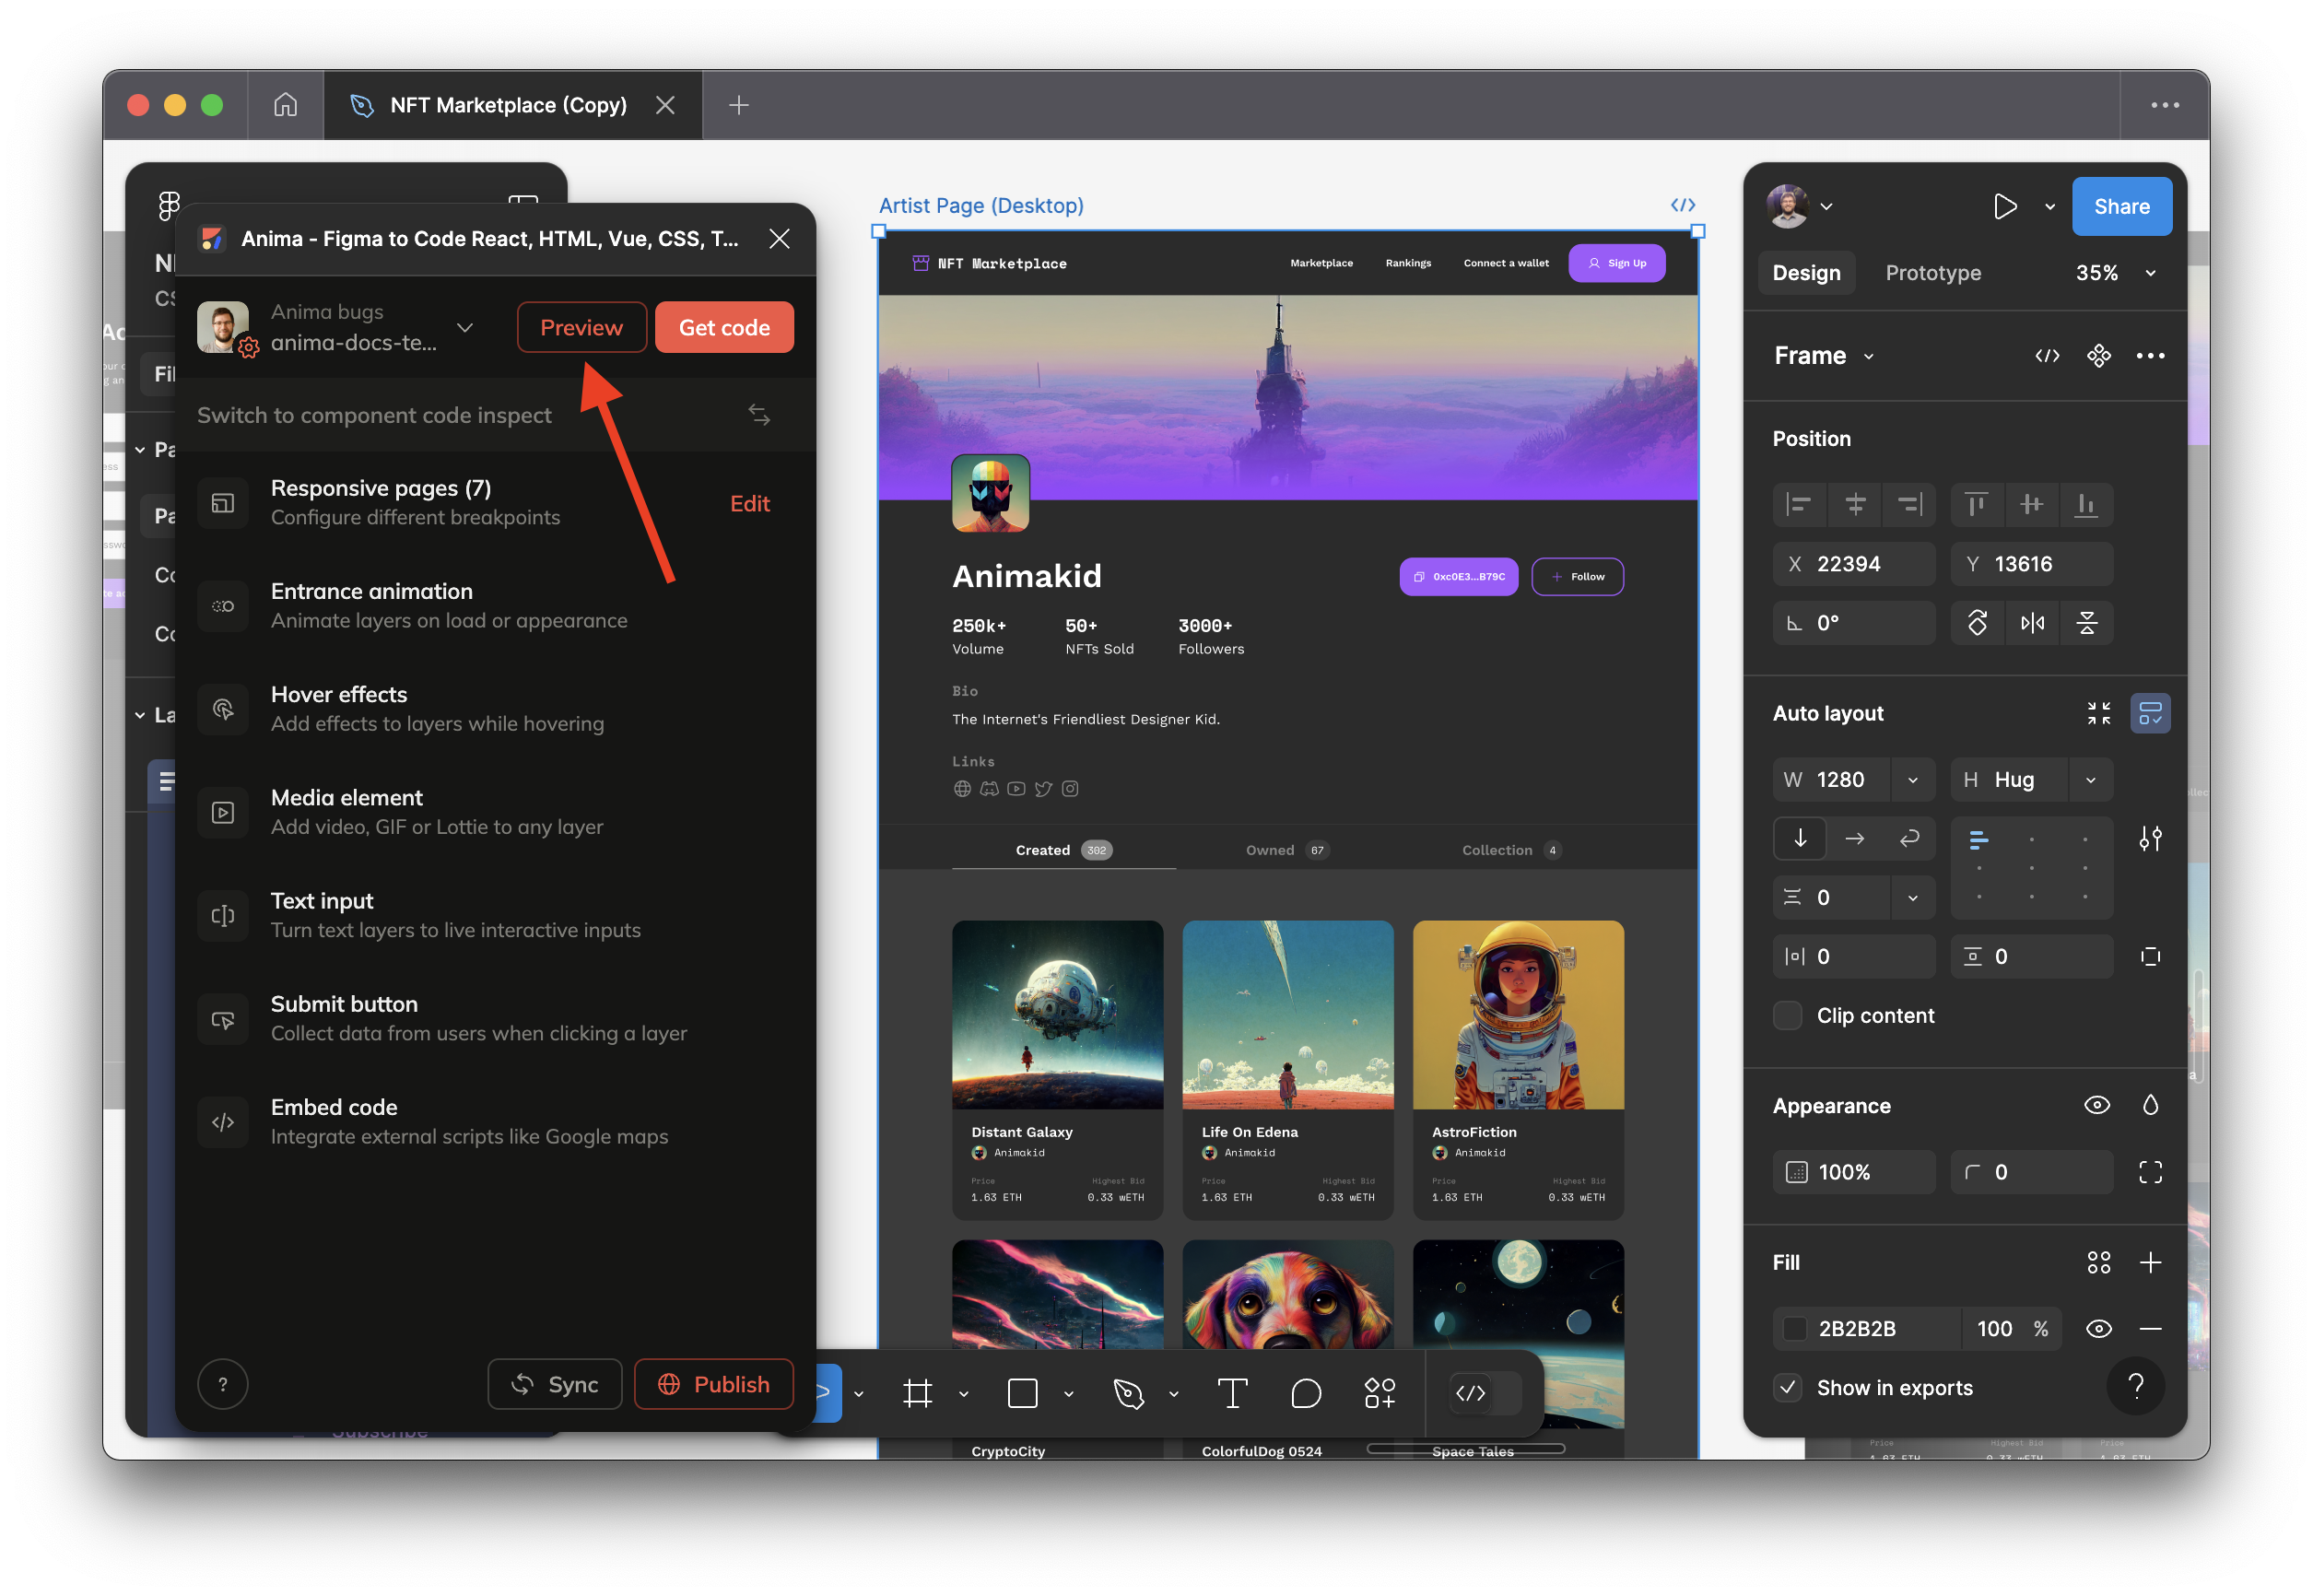
When you click Preview, Anima will create a private draft of your work that only you can see. This way you can check out and test different designs and how they work as code before sharing them with your team or exporting.
Once you have finished the setup (selecting the correct team and selecting/creating a new project), you are ready to preview your website.
-
Select the frames you want to preview
-
Press the "Preview" button at the top of the Anima plugin panel

-
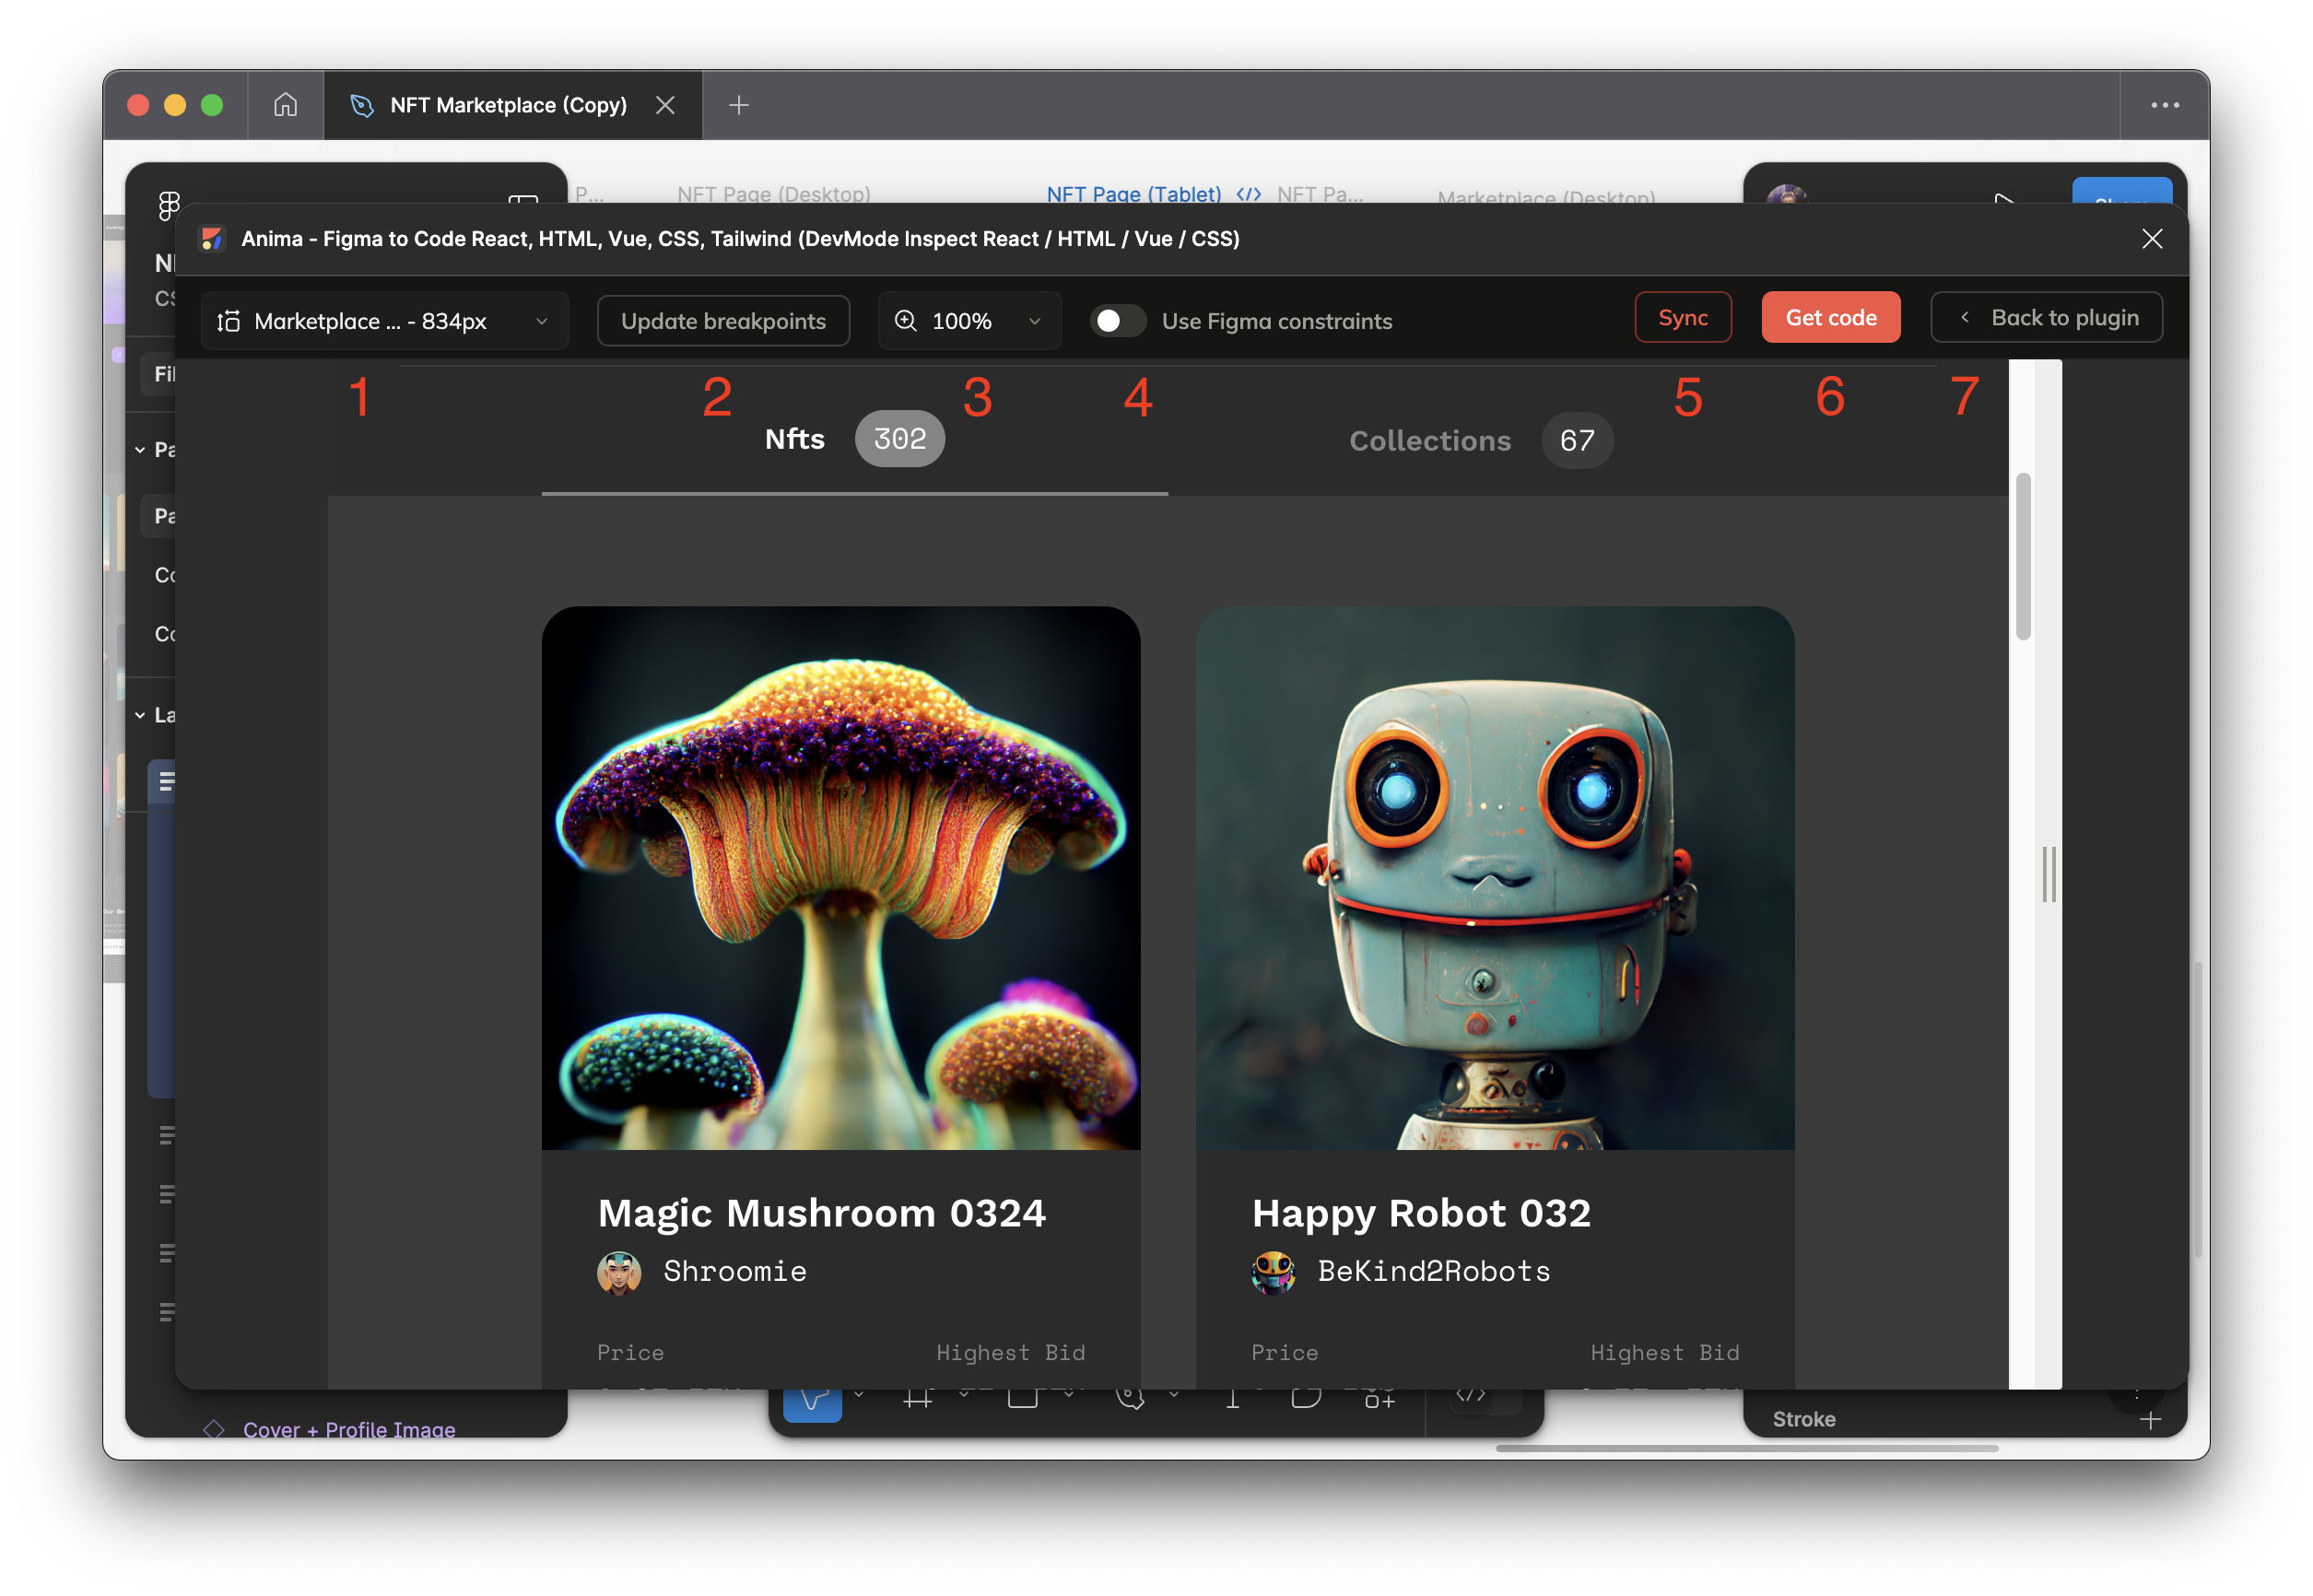
A new Preview window will open, where you can test your preview as it will look in the live version. In that window there are multiple options in the top toolbar (according to the numbers on the screenshot below):
- 1 - Frame selector - here you can select the frame you want to preview
- 2 - Update breakpoints - set breakpoints to select Figma frames to be connected as the same screen.
- 3 - Zoom - select how you want to visualize your preview
- 4 - Use Figma constraints - Toggle this to include the constraints defined in Figma in your prototype
- 5 - Sync - Uploads your project to Anima's web app.
- 6 - Get code - In addition to uploading your project, this button takes you straight to Anima's web app, where you can download a ZIP file with the code generated.
- 7 - Back to plugin - Closes the preview window and takes you back to your Figma design

Once you are happy with your draft, you can Sync it and upload it to Anima.
Updated 27 days ago